

Sidebar
You can shape what everyone in your organization sees in the left sidebar: pin the apps people should be able to find in one click, and set the links in everyone’s account menu, such as your help center or an internal portal.Only Organization Admins (
org:admin) can change the sidebar, because it affects every member. See Roles & Permissions.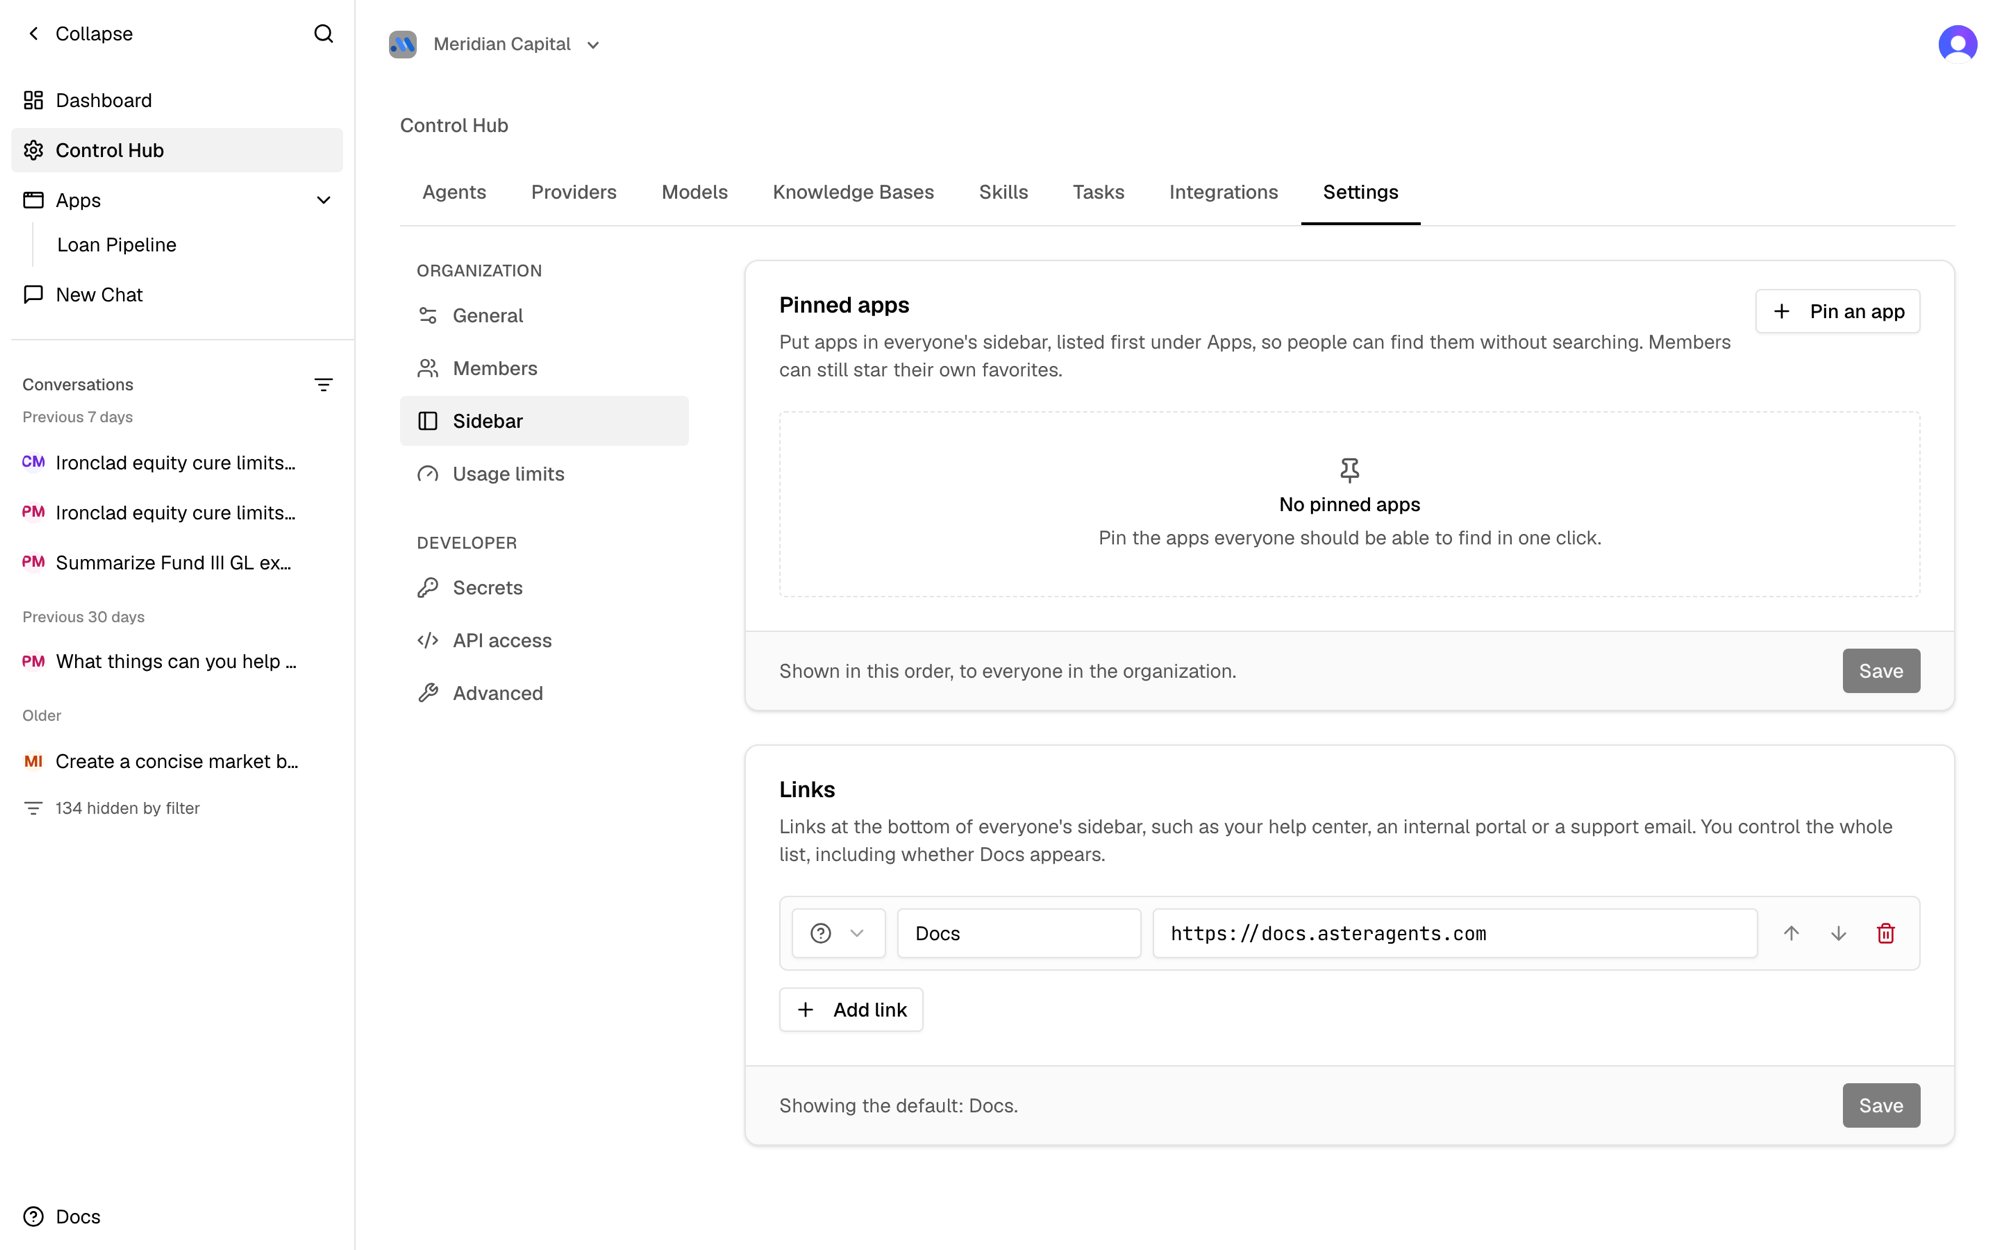
Pinned apps
Pinned apps appear as their own rows near the top of every member’s sidebar, in the order you choose, so each one is a direct way into that part of your work. Each row shows a small tile with the first letter of the app’s name, which is what stays visible when the sidebar is collapsed. People who join later see them too.- Click Pin an app and search for the app.
- Use the arrows to put pinned apps in order, or the trash icon to unpin one.
- Click Save.
Pin for a group
A pin can be aimed at groups instead of everyone. Click the Everyone button on a pinned app, choose one or more groups, and save. Only members of those groups see that pin; everyone else sees the rest of the list in the same order. Someone in several groups sees the pins for all of them. This decides whose sidebar shows the app, not who can open it. Anyone in the organization can still find it under All apps, or pin it for themselves. Deleting a group takes it off every pin, and a pin that was aimed only at that group is unpinned. Below the pinned apps, All apps opens every app in your organization.Links
The links in the account menu (click your name at the bottom of the sidebar) default to Docs. You can replace them with your own, for example your help center, an internal portal, or a support email address.- Click Add link.
- Pick an icon, enter a label, and enter the URL.
- Use the arrows to reorder links, or the trash icon to remove one.
- Click Save.
- URLs must start with
https://,http://, ormailto:. - Web links open in a new tab, and
mailto:links open the person’s email app. - You can add up to 8 links, with labels up to 40 characters.